Build Your Own Personal Voice Assistant Part 2
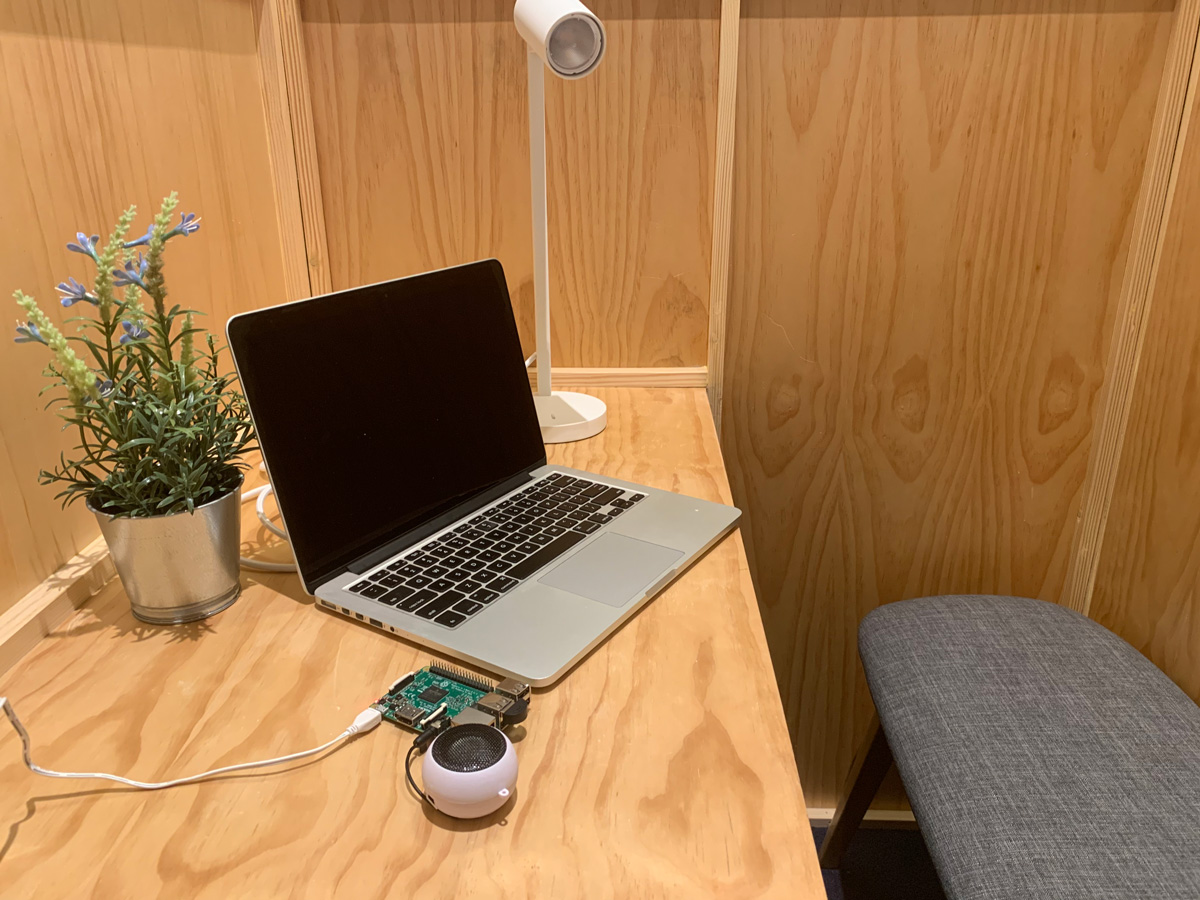
In the previous post, we covered how to set up the Raspberry Pi and how to set up your microphone and speaker for your DIY voice assistant. In this last part of the tutorial, we will go through the process of setting up the Google Assistant and linking up the light for the finished product.
Hardware and software you need and where to find them:
| Hardware/Software | What does it do? | Where can I buy it? |
|---|---|---|
| FOR VOICE CONTROL SETUP | ||
| Browser Logged Into a Google Account | To download the required software developer kit from Google and link the smart WiFi plug | [nil] |
| FOR LIGHT CONTROL CIRCUIT | ||
| Lightbulb With Power Plug | A home appliance that can be controlled by the smart WiFi plug | Any hardware store |
| Sonoff WiFi UK Plug (We use Sonoff in this tutorial but feel free to use any brand of WiFi plug) | The plug that links with the Google account for controlling the lights | Tech stores or online |
| 2.4Ghz WiFi | Required to link the WiFi plug | [nil] |
Retailers are provided for reference only. GovTech TechNews is not affiliated with any of the retailers listed in this tutorial.
Step 1: Setting up the Google Project
-
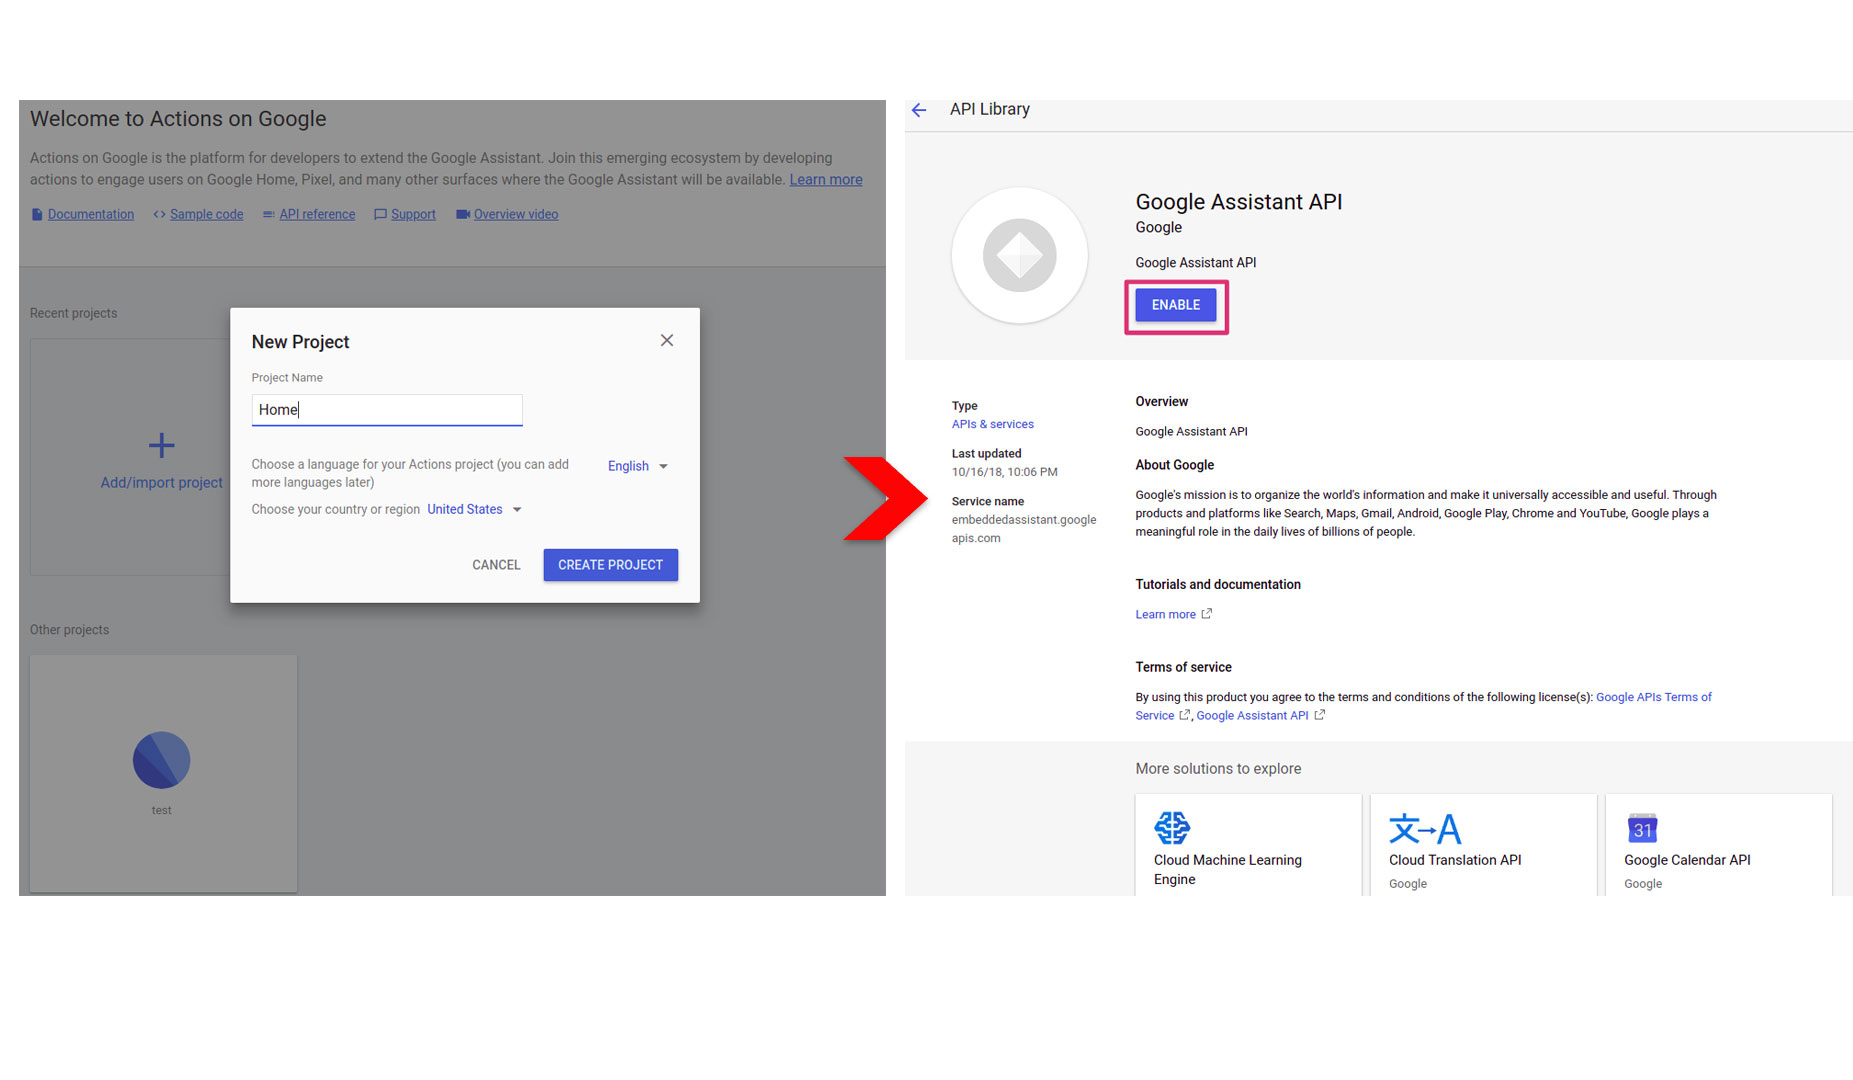
On the Pi’s browser, sign in to your Google Account. Then go to Google Action Console and click “New Project”. Give a name to the project and click “Create Project”. This will take a while so proceed with the next steps while leaving the tab open.
-
Go to Google Assistant API website and click Enable. This will allow us to use the Google Assistant on our Pi.
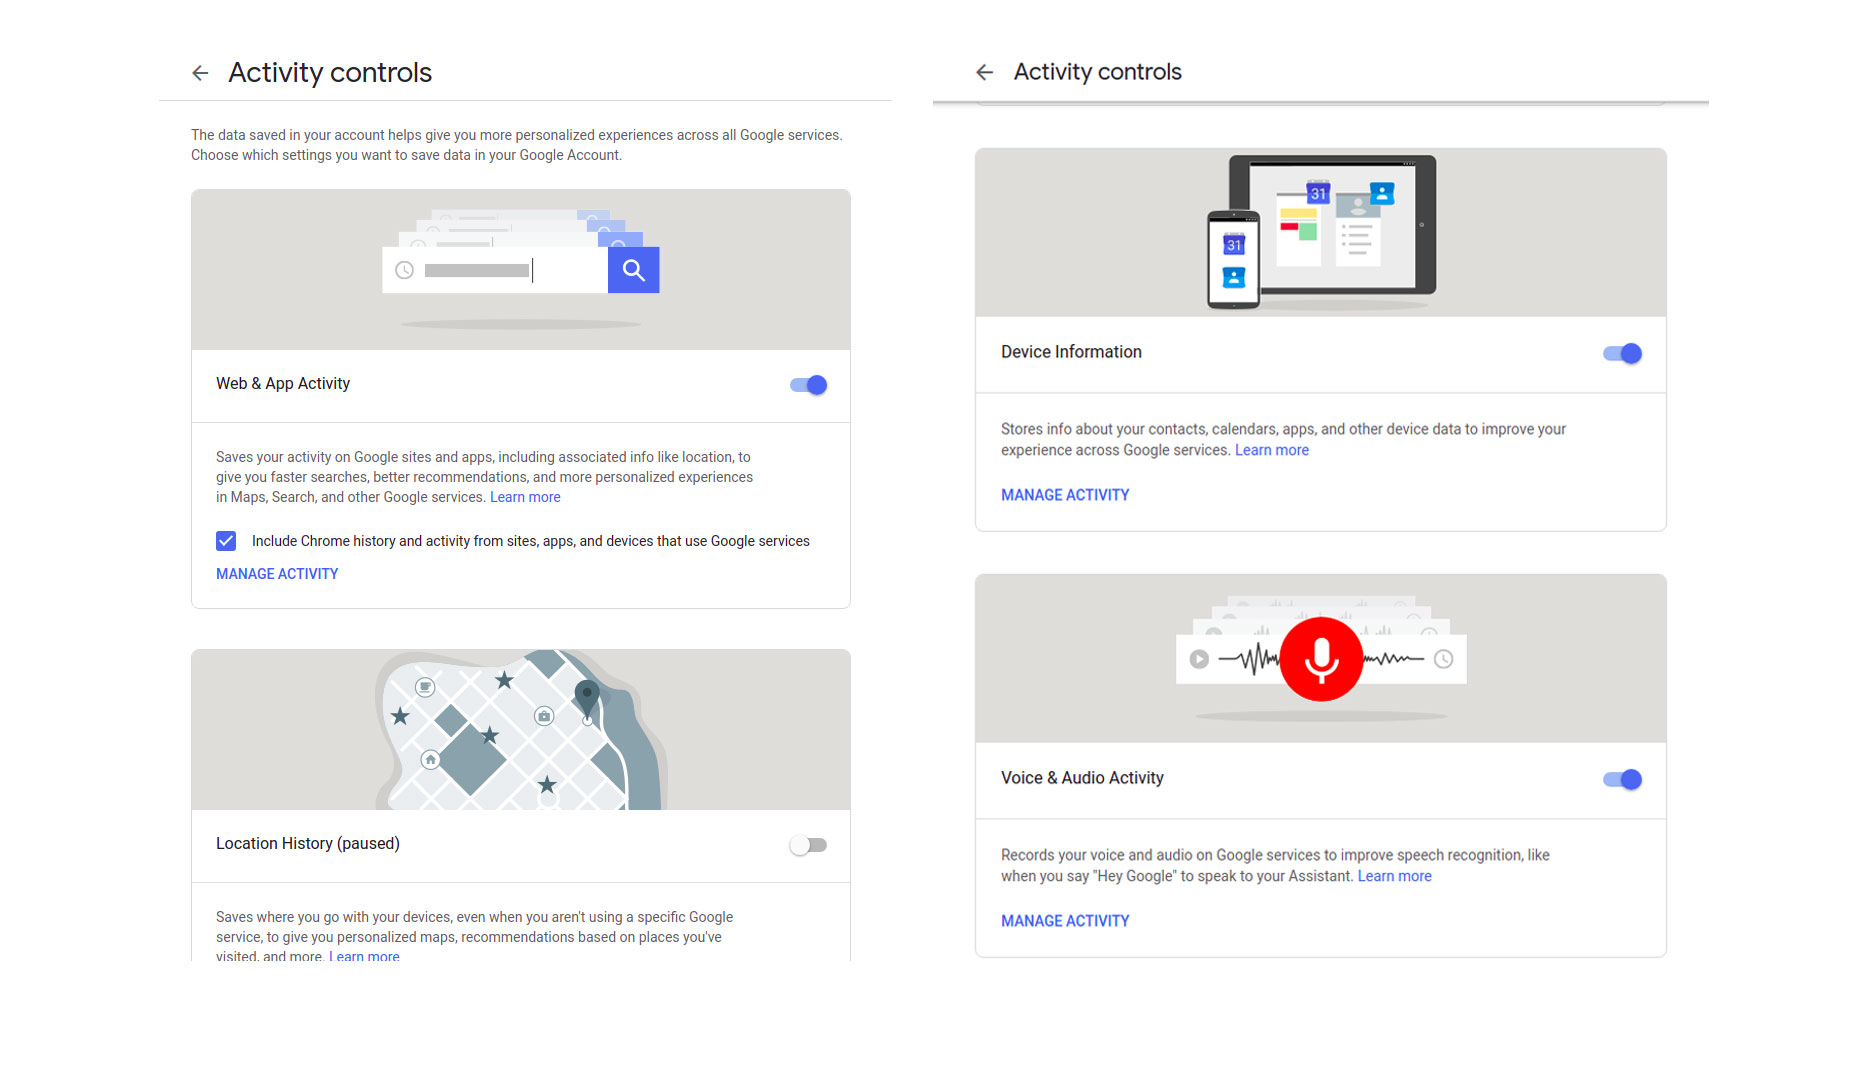
- Go to Activity Control Panel and make sure the following activities are turned on.
- Web and App Activity (including Chrome history checkbox)
- Device Information
- Voice and Audio Activity
-
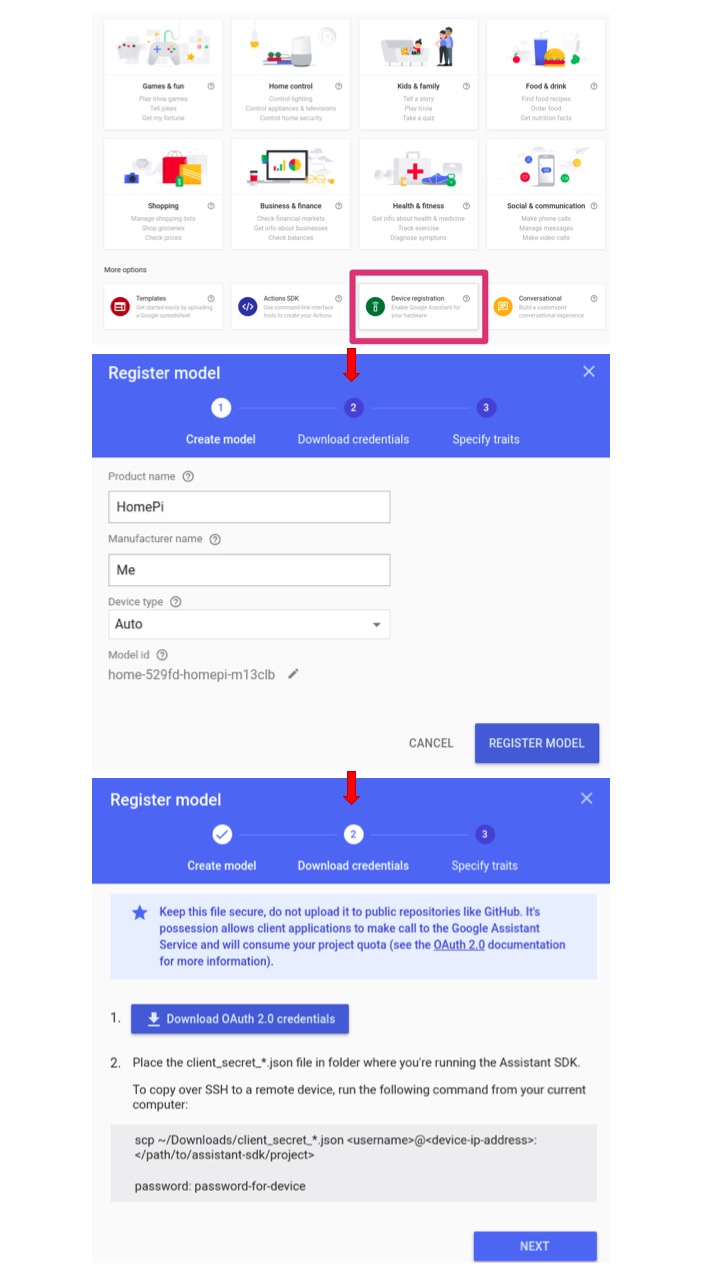
Go back to Google Action Console and find the Device Registration button.
(If you can’t find the page for device registration, use
https://console.actions.google.com/u/0/project/{project-name}/deviceregistration/. Note that you should change the {project-name} in the link to the project name you have created in Step 1)Click on it and then click on Register Model. You can enter any name you like for your Pi and Manufacturer name* (the latter is not important but you still need to key in something), and set the Device type to Auto.
-
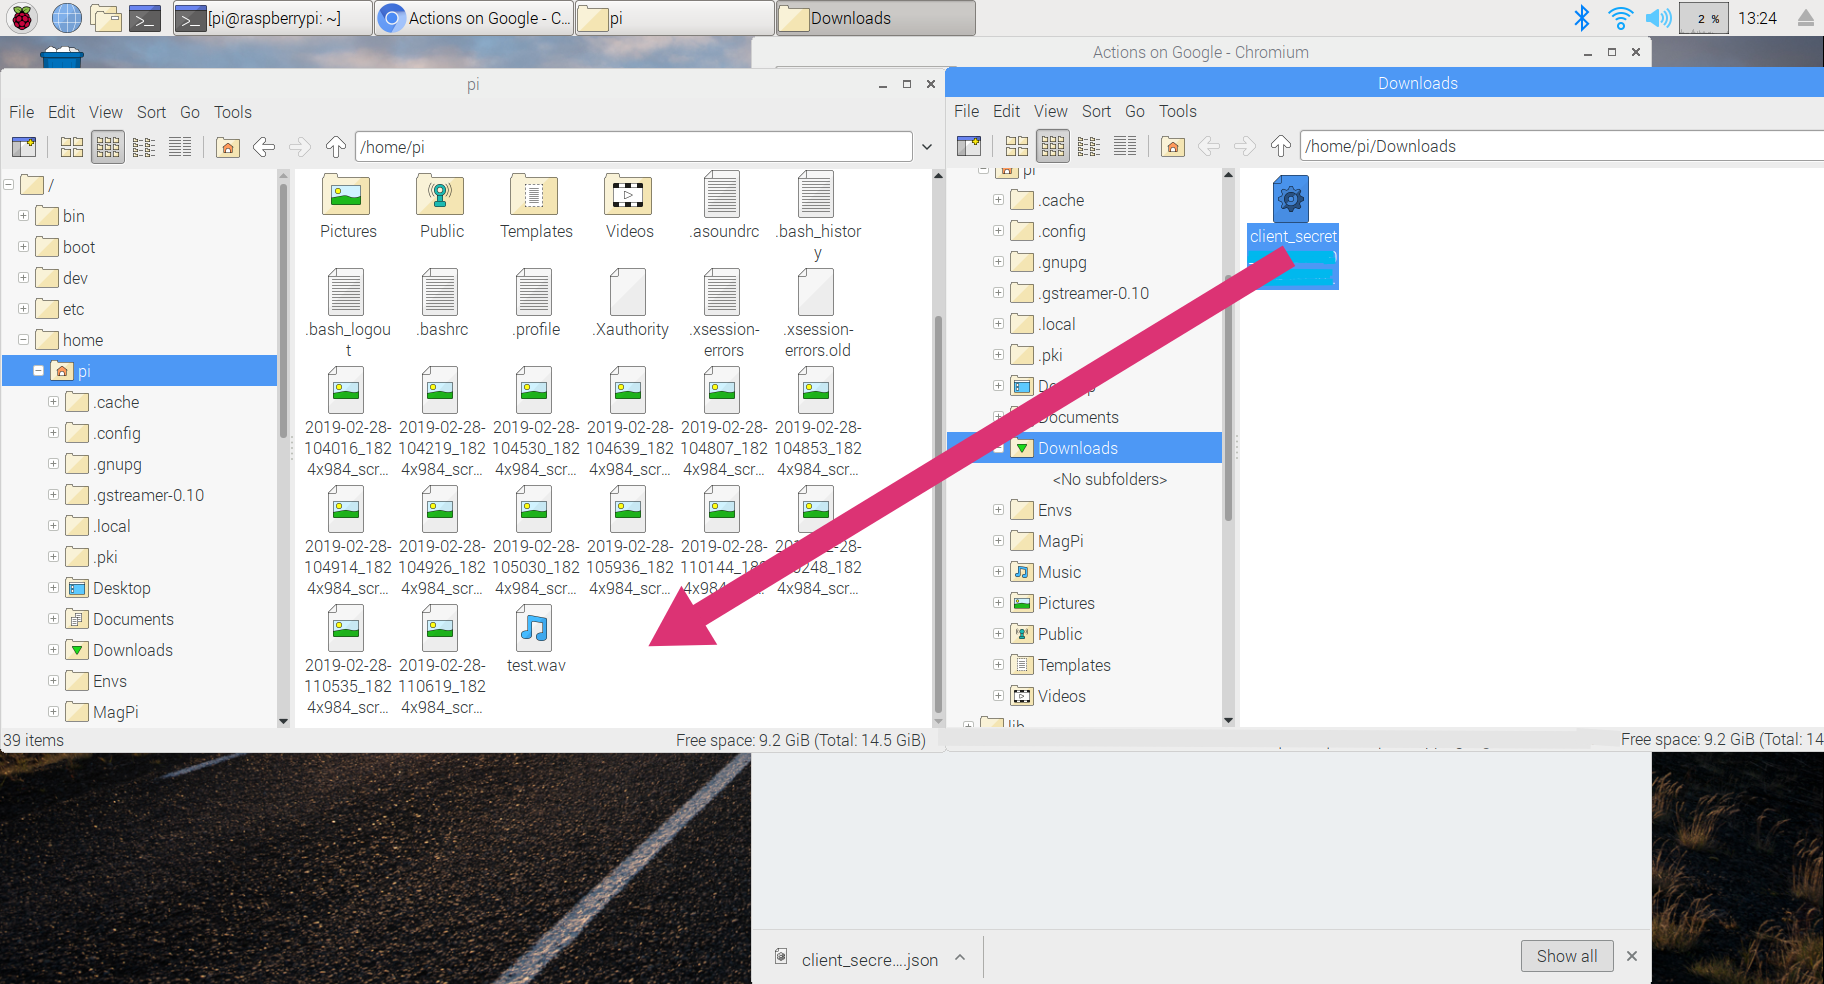
Click on Register Model and download the OAuth2.0 Credentials. After the file has been downloaded, move it to the /home/pi directory
-
Check if python is installed on the Pi by typing in the Terminal
phytonPython should be installed by default in Raspbian. If it is installed, you will see the following:

Exit out of the python programme by pressing ctrl-d.
If it is not installed, install it by typing
sudo apt-get install python -
Recommended by Google: Make a Python virtual environment for Google Assistant by first installing virtual environment and virtual environment wrapper.
 pip install virtualenv
 pip install virtualenvwrapper
After this is done, configure the virtual environment wrapper
 export WORKON_HOME=~/Envs
 source ~/.local/bin/virtualenvwrapper.sh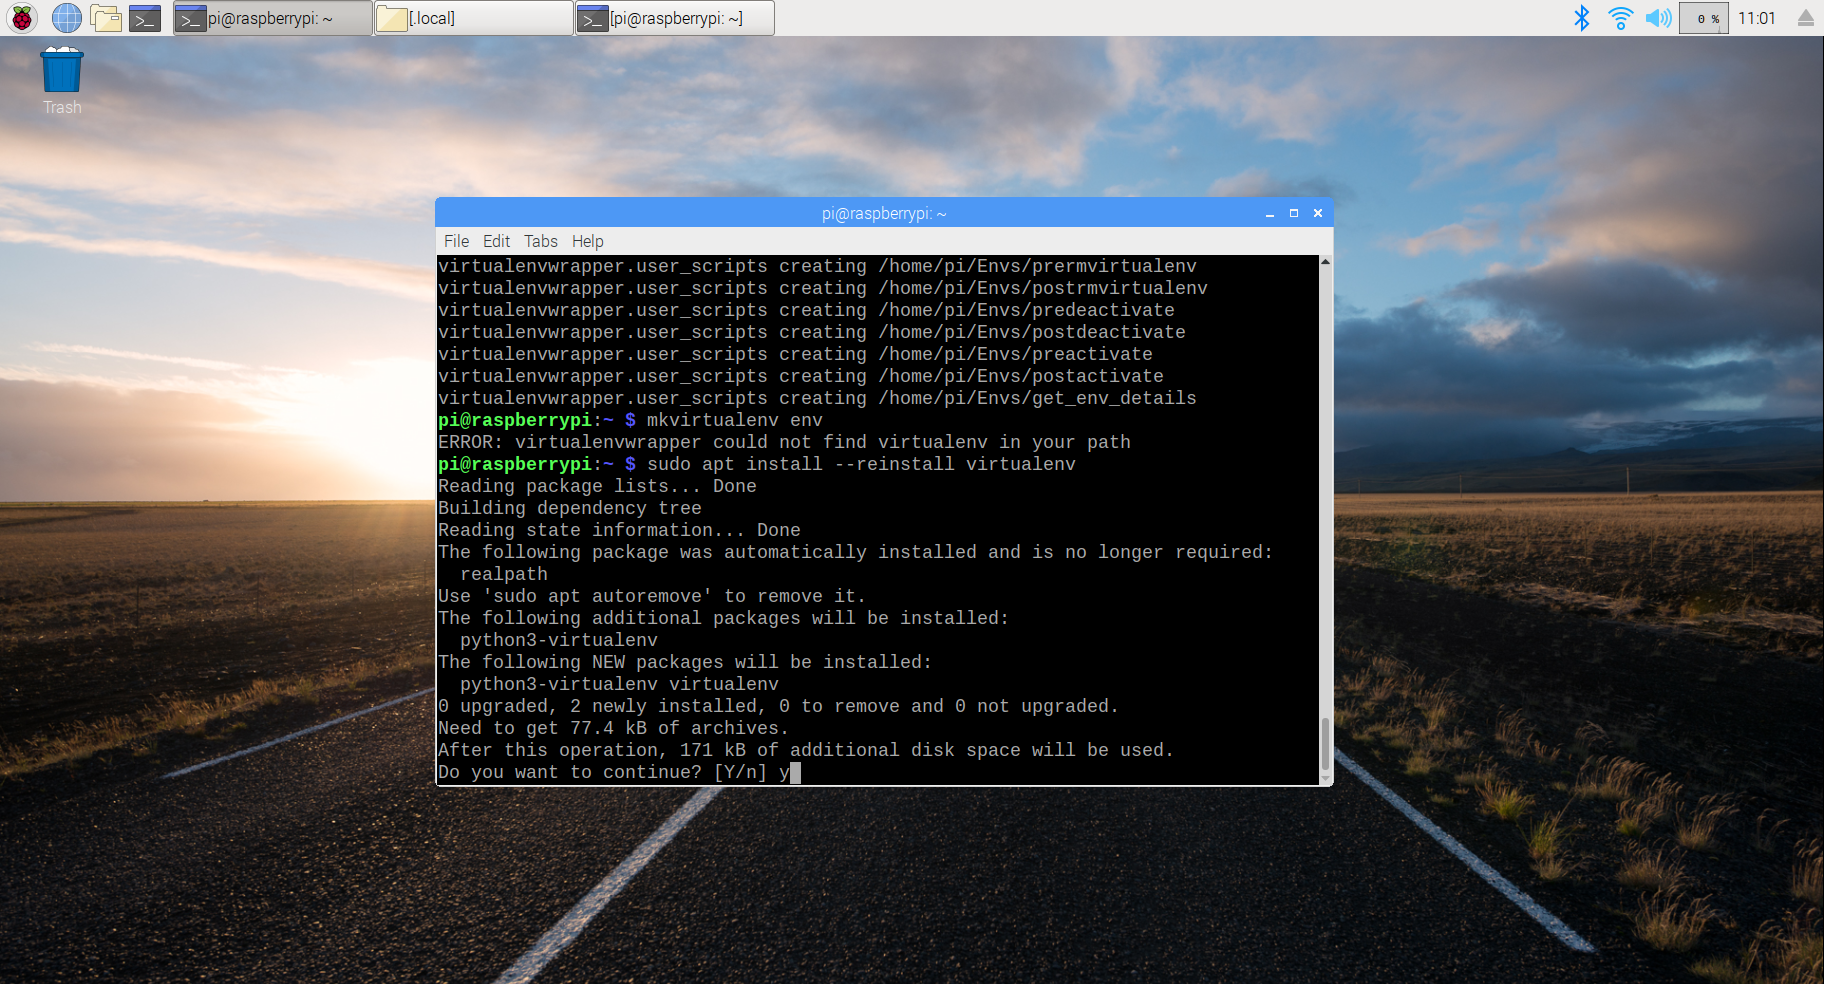
Make the environment for Google Assistant to run in
 mkvirtualenv env  *If the above step throws an error, it might be that the virtualenv that did not install properly. Try the following code to reinstall virtualenv:


 sudo apt install --reinstall virtualenv
Setting up the lights
- As we are using the Sonoff WiFi UK Plug switch in this tutorial, download eWeLink app from the Google Play Store for Android or App Store for iOS devices.
- Sign up for an eWeLink account.
-
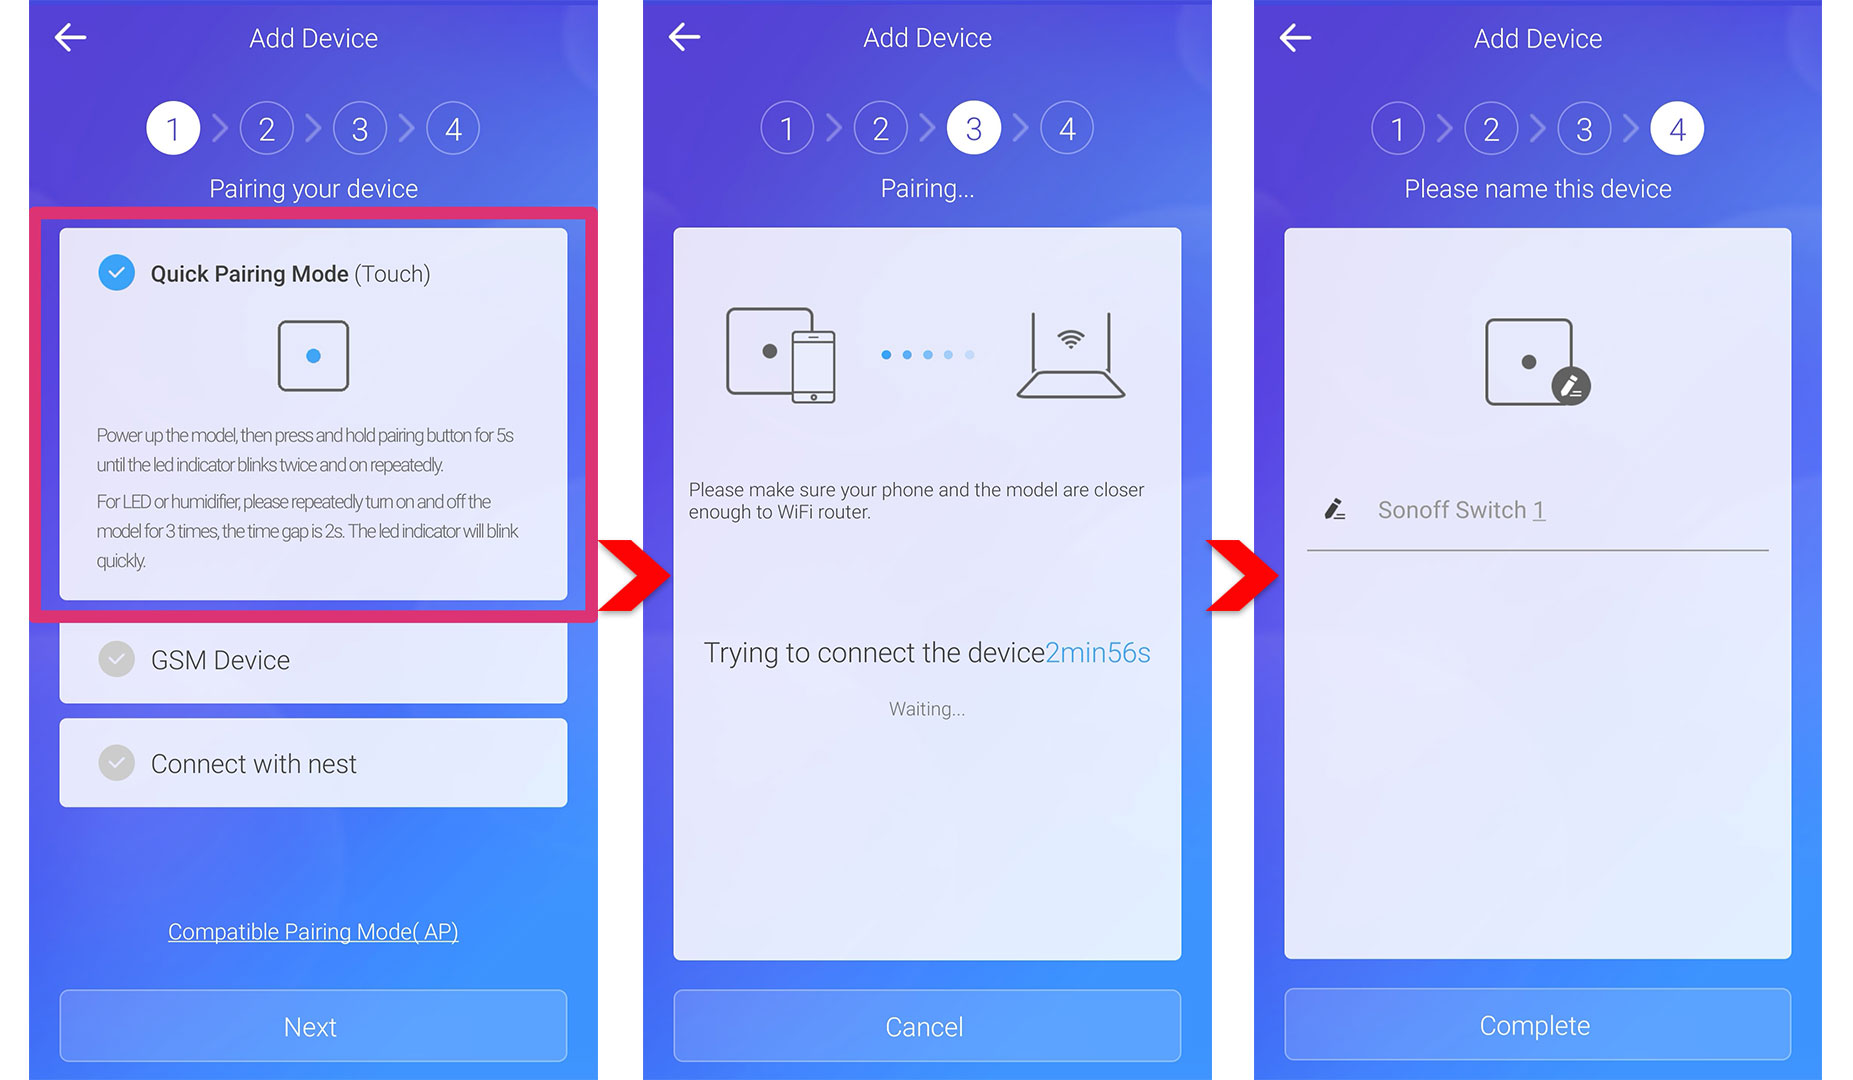
Turn on the WiFi plug and click on Add Device (plus sign) in the eWeLink app.
- Choose the first option (Quick Pairing Mode)
- Next, choose a WiFi network (note the switch only supports 2.4GHz WiFi) and provide the credentials to the WiFi.
-
The app will then attempt to pair the switch and on success it will ask you to name the device. You can name the device however you prefer.
-
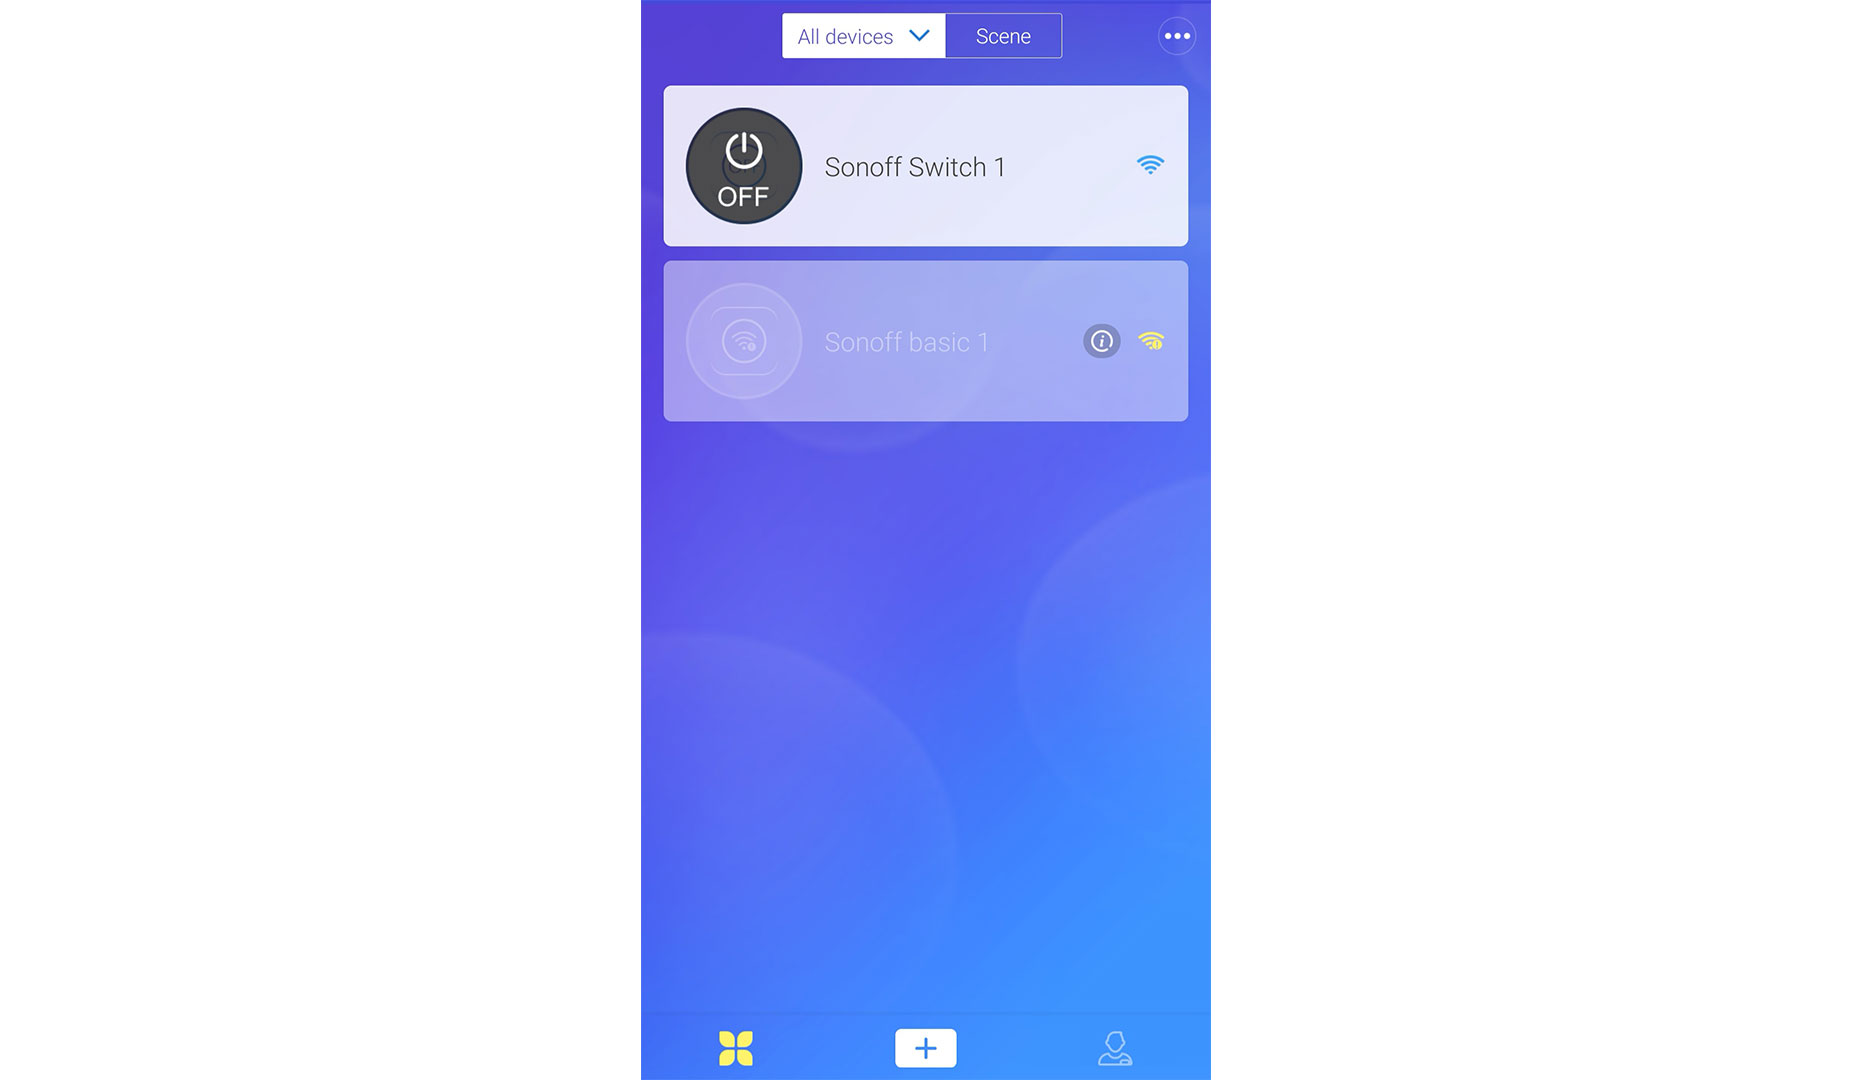
Once connected, you should be able to control the plug through the app. Try it out by plugging the light into the plug and switching the plug on and off through the app.
-
Download Google Home on your phone. Make sure it is logged into the same account you used for the Google Assistant setup.
-
Go to Add Device and select “Have something already set up?” option. Search for Smart We Link on the list of support devices and select it.
-
Log into your eWeLink account and allow Google access.
-
Add the switch device which you have named in step 6. Assign it to a room (whichever room you like).
-
Now you can control the light through your Home app as well.
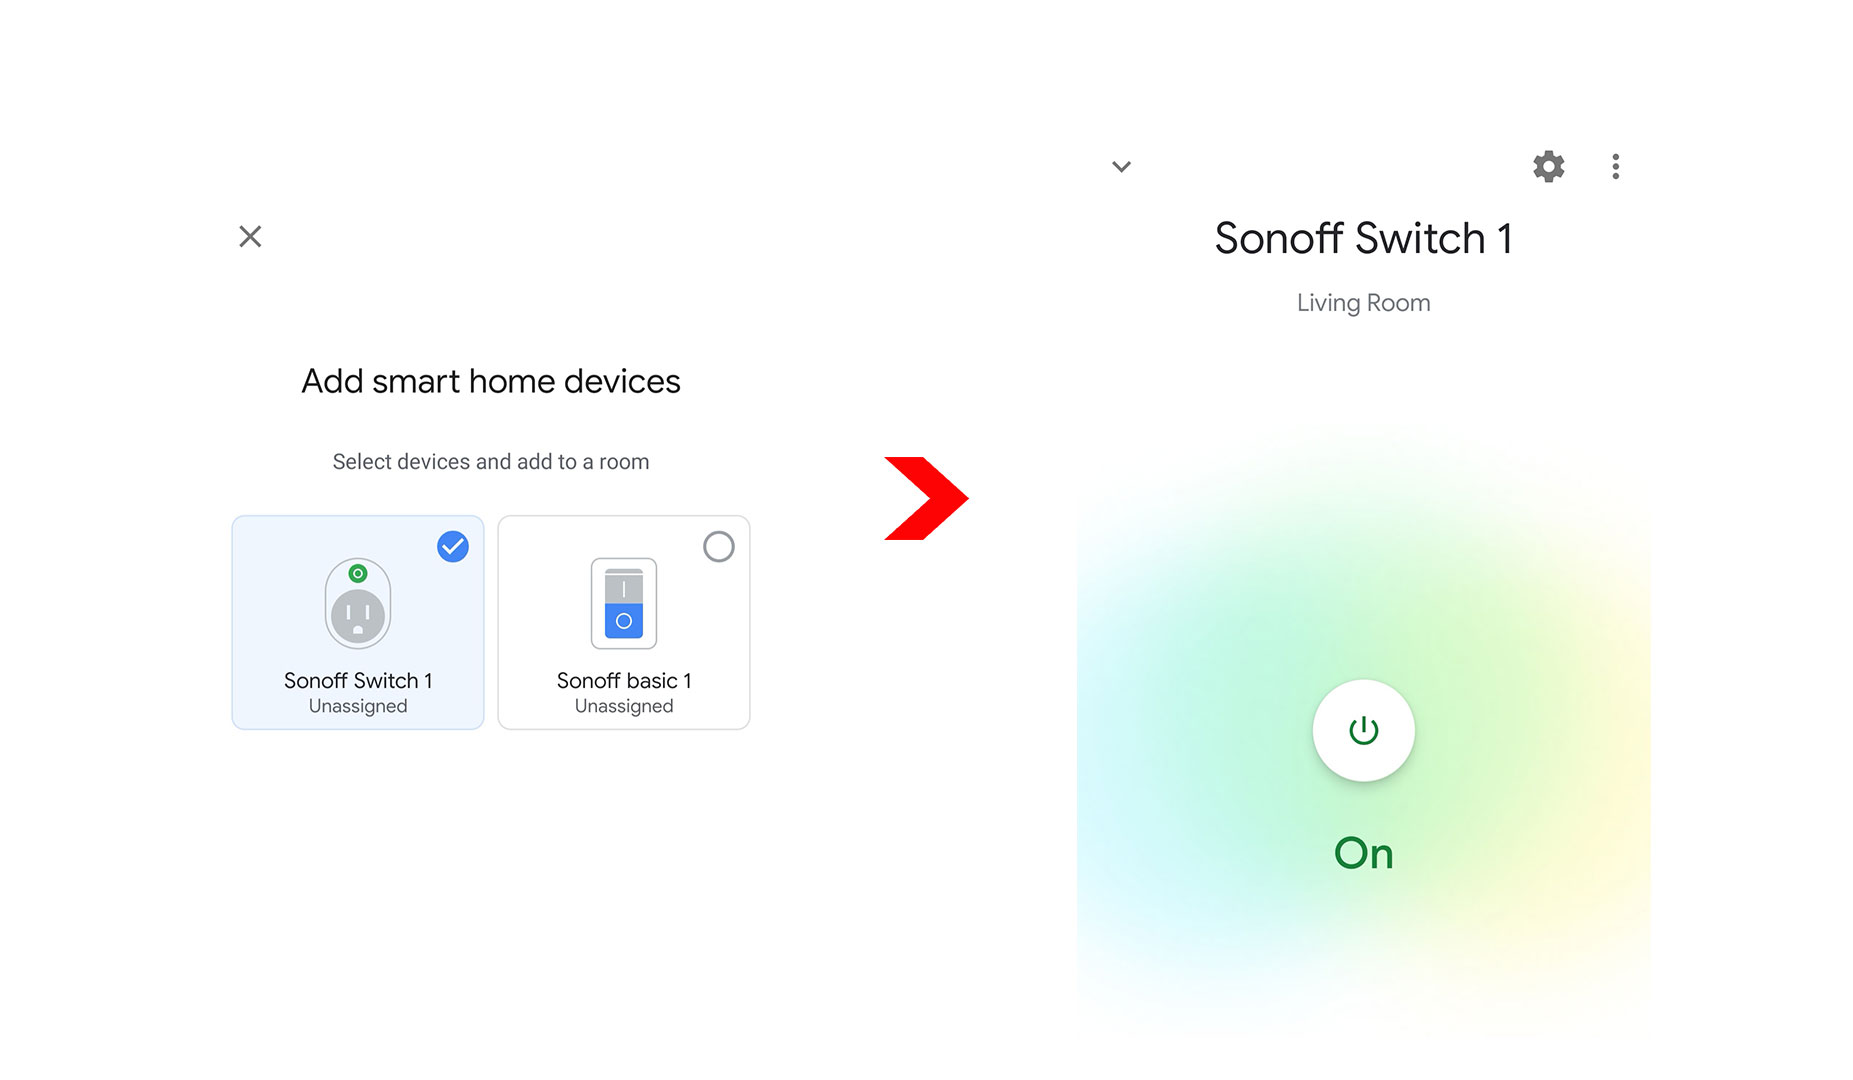
-
Try controlling the light through Raspberry Pi Assistant by saying “Ok Google” or “Hey Google”, following with “Turn on [your device name from step 6]” The light should turn on.
-
To make things easier through voice control, you can change the device name to “Lights” by selecting the device and then the settings icon. Now you can control the lights by saying “Turn on/off the lights”.
You can use the Sonoff WiFi Plug for any other household appliances as long as it does not take up more than 10A of current, as the switch is rated for up to a maximum of 10A. (For example, fans or pet feeder) Any appliances connected to the switch drawing more than 10A will damage the switch. For air conditioning control, you can look for infrared control device such as Tado, which controls air conditioning with infrared information rather than directly controlling the power supply (which is what the Sonoff Switch does in this tutorial) and is able to link to Google Home as well for voice control.
And with that, your AI voice assistant should be fired up and ready to go! Definitely try your hand at building a cool case for it. Our case was made in the form of a pie to commemorate Pi Day on March 14, but you can let your creativity flow and make all kinds of cases - just remember to leave holes for the speaker and microphone!

